
Security in MongoDB: Authentication and Authorisation
Authenticating a MongoDB client is the first step. When access control (authorisation) is enabled, MongoDB requires clients to authenticate before determining their access. Its several authentication methods allow MongoDB to integrate with your existing systems.
The main authentication methods that are available are as follows:
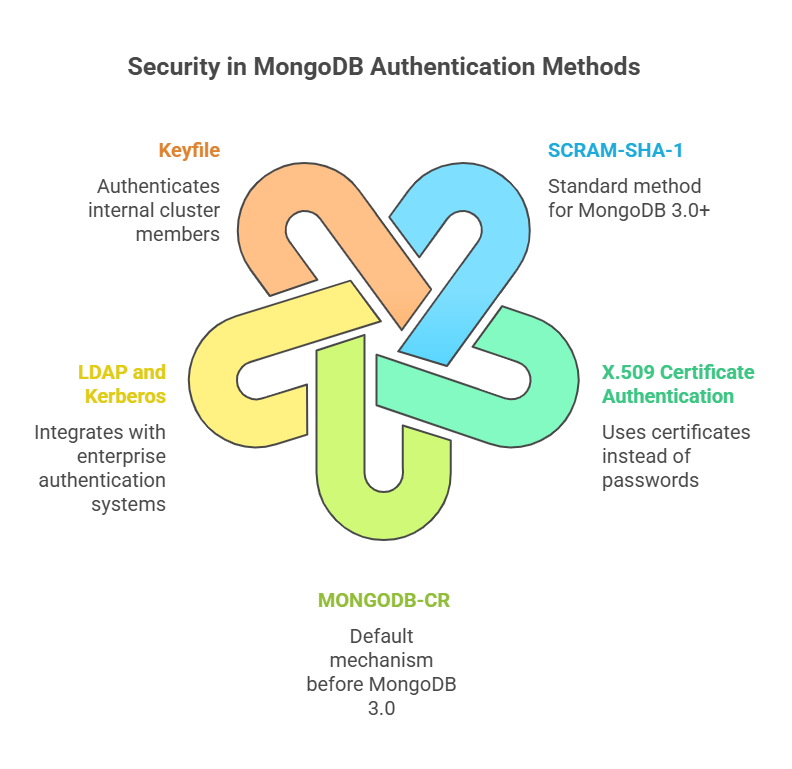
- SCRAM-SHA-1: For MongoDB versions 3.0 and up, SCRAM-SHA-1 is the standard authentication method. The safe challenge-response techniques for password-based authentication are outlined in the IETF standard (RFC 5802). It incorporates server-to-client authentication and makes use of the cryptographically more robust hash function (SHA-1).
- X.509 Certificate Authentication: When paired with secure TLS/SSL connections, MongoDB facilitates X.509 certificate authentication. In place of conventional usernames and passwords, this enables clients to authenticate using certificates. Members of a sharded cluster or replica set can also utilise it for internal authentication.
- MongoDB Challenge and Response (MONGODB-CR): Prior to MongoDB 3.0, MongoDB Challenge and Response (MONGODB-CR) was the default mechanism.
- LDAP proxy authentication and Kerberos authentication: MongoDB business editions include with capabilities like Kerberos authentication and LDAP proxy authentication that make it possible to integrate with pre-existing business authentication solutions.
- Keyfile: Used to authenticate members of sharded clusters and replica sets internally. The key file’s contents function as a shared secret.
Once a user’s identification has been confirmed, authorization also referred to as access control takes effect, establishing which resources and functions the user is permitted to access. The Role-Based Access Control (RBAC) concept is used by MongoDB. Authorisation is not enabled by default. Every MongoDB connection must be authenticated when it is.
In MongoDB, a role is basically a group of privileges. The actions (operations) that are allowed on a specific resource (such as a cluster, database, or collection) are then specified by a privilege. Users are given one or more roles that specify what they are allowed to do.
Creating Users and Assigning Built-in Roles
Within the admin database, MongoDB maintains user credentials and responsibilities given to them in the admin.system.users collection. The admin.system.roles collection contains custom-defined roles.
User creation and built-in role assignment usually follow this pattern:
- Start MongoDB without authentication (for initial setup): Initial MongoDB setup requires starting mongod without authentication to generate your first administrator user.
- Connect to the admin database: The first administrative user will be created here.
- Create a user administrator: Before you may manage other users, you must create a user with the necessary rights. Because it allows for user and role management activities across all databases, the userAdminAnyDatabase role is perfect for this.
- MongoDB’s “localhost exception” is limited after this user is created; it only permits connections from localhost to create the admin database’s first user before ceasing to be applicable.
- Stop MongoDB: Gently end your instance of MongoDB.
- You can also use Ctrl+C from mongod’s interactive command line.
- Restart MongoDB with authentication enabled: The –auth option is used for a solitary instance. Usually, you would use –keyFile for sharded clusters or replica sets.
- Authenticate as the user administrator and create other users: Create more users after authenticating as the user administrator: Use the administrator user you just created to connect now.
- Next, make users with more specialised jobs, like this:
- The db.grantRolesToUser() method assigns roles to existing users.
You can programmatically create users. For instance, in Java:
// Creating a Mongo client
MongoClient mongo = new MongoClient( "localhost" , 27017 );
// Creating Credentials
MongoCredential credential;
credential = MongoCredential.createCredential("sampleUser", "myDb", "password".toCharArray());
System.out.println("Connected to the database successfully");
// Accessing the database
MongoDatabase database = mongo.getDatabase("myDb");

// To create a user 'dev' with password 'password123' and 'readWrite' role on 'testDB'
MongoDatabase db =  mongo.getDatabase("testDB");
Map<String, Object> commandArguments = new BasicDBObject();
commandArguments.put("createUser", "dev");
commandArguments.put("pwd", "password123");
String[] roles = { "readWrite" };
commandArguments.put("roles", roles);
BasicDBObject command = new BasicDBObject(commandArguments);
db.runCommand(command);
System.out.println("User 'dev' created successfully with readWrite role on testDB");
Common Built-in Roles: A collection of built-in roles is offered by MongoDB.
- read: Gives non-system collections and specific system collections (such as system.indexes and system.js) in its database read-only access.
- readWrite: Provides the ability to change data on non-system collections and system.js within its database in addition to read privileges.
- dbAdmin: For database administration duties including indexing, statistics collection, and schema changes. Role and user management privileges are not granted by it.
- userAdmin: Enables users and roles to be created and modified inside the existing database.
- dbOwner: A role that combines readWrite, dbAdmin, and userAdmin rights for a single database is called dbOwner.
- readAnyDatabase: Provides read access to all databases, with the exception of local and configuration databases, as well as the cluster’s listDatabases action.
- readWriteAnyDatabase: Grants for readWriteAnyDatabase readWrite access to all databases, excluding local and configuration databases, as well as the listDatabases action.
- userAdminAnyDatabase: Like userAdmin, but applicable to all databases, userAdminAnyDatabase is essentially a superuser for user administration.
- dbAdminAnyDatabase: Like dbAdmin, but applicable to all databases, along with the listDatabases action, is dbAdminAnyDatabase.
- root: Combines readWriteAnyDatabase, dbAdminAnyDatabase, userAdminAnyDatabase, clusterAdmin, restore, and backup roles to grant unrestricted access.
Basic Network Security, including TLS/SSL
A strong MongoDB setup requires a secure network. Firewall rules should restrict access to only trusted machines, and instances should always operate in a trusted network environment.

Important network security setups consist of:
- Binding IP Addresses: You can specify which network interfaces MongoDB will listen on using the –bind_ip option or net.bindIp in a config file. This is essential for blocking access to internal IPs only application servers and cluster members can access.
- TLS/SSL Connections: Encrypts MongoDB instance-client network traffic to protect data. MongoDB uses OpenSSL for this.
- You must create and sign a Root Certificate (CA file), Certificate Requests (CSRs), and Private Keys in order to configure a replica set with TLS/SSL. It is ensured that all connections must utilise SSL/TLS by using the –sslMode requireSSL or –tlsMode requireTLS option.
- An illustration of how to launch a mongod using SSL/TLS:
- The SSL/TLS settings and certificate files must be specified to connect a client like the mongo shell:
- MongoDB supports TLS/SSL in all editions.
- Disable HTTP Interfaces: A simple HTTP server for status information is provided by MongoDB. Since it lacks authentication control, this should be turned off in production using –nohttpinterface (or net.http.enabled: false in a config file) to reduce network exposure.
- Disable Server-Side JavaScript: Use –noscripting to turn off server-side JavaScript if your application doesn’t use it (for example, for mapReduce or $where operators). This lessens the possibility of security flaws.
Applying these network security, authentication, and authorisation procedures will greatly increase the security of your MongoDB operation.