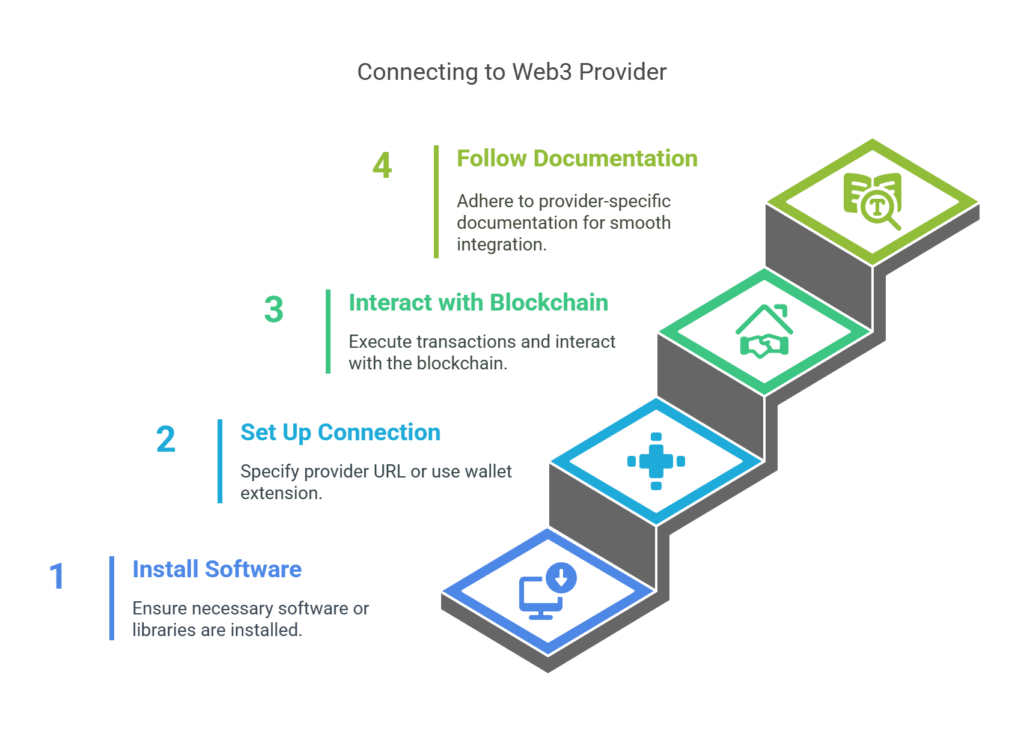
We cover a wide range of subjects, including the definition of the web3 provider, its basic objectives, supported connection protocols, integration with web3.js and DApps, common tools and use cases, DApp mechanisms, and how to connect to web3 provider.
What is a web3 provider?

As the connection manager that let web apps to communicate with an Ethereum node, the web3.providers module is an essential part of the web3.js JavaScript framework. Its main duties include providing a simple interface for sending JSON-RPC messages and making notification subscriptions, as well as abstracting the connection protocol in use.
Web3.providers Fundamental Goals
- The web3.js library connects to an Ethereum client node via web3.providers. DApps (Decentralised Applications) can access the underlying blockchain services thanks to this connectivity.
- It acts as the “entry point” to the blockchain and is usually accessed by a remote service or an HTTP RPC server that is visible on a locally operating Geth node.
- It is the provider’s responsibility to determine which node to connect to in order to submit transactions to the network and make calls to smart contracts.
Supported Connection Protocols
Web3.providers provides similar classes, and Ethereum nodes can handle JSON-RPC communications over the three main protocols:
- JSON-RPC messages can be sent via HTTP (Web3.providers.HttpProvider), the easiest option. For instance, this is how you use Infura’s HTTP API, however it might not support all expensive actions like newFilter.
- A persistent, two-way connection between the client and the node is provided via the WebSocket Protocol (Web3.providers.WebsocketProvider) protocol. It allows real-time event subscriptions, unlike HTTP connections. IInfura supports WebSocket wss://mainnet.infura.io/ws/v3/PROJECTID.
- An Ethereum client like Geth generates an IPC pipe on the local filesystem (e.g., geth.ipc) to communicate locally on the same machine.
Integration with web3.js and DApps
- The web3 provider is used to initialise the web3 object in a DApp. App.web3 = new Web3(App.url); or web3 = new Web3(Web3.givenProvider); are two examples.
- Account administration, smart contract engagement, and blockchain information retrieval are all handled by the web3.eth module, which depends on the underlying provider for communication with the node.
- For DApp developers, the web3.js framework itself simplifies these intricate interactions by offering an API to access blockchain node services.
Typical Tools and Use Cases
- The popular browser plugin MetaMask injects a provider object like window.ethereum or window.web3.currentProvider into the global scope. This lets DApps send transactions and query data without a local Ethereum node.The injected provider in MetaMask additionally serves as a “signer” and employs “subproviders” to polyfill functionality (such as event filters) that may not be natively supported by the linked node.
- Ganache: Ganache is a simulated Ethereum blockchain node that acts as a web3 provider for local development and testing. Testers benefit from its automatic block mining for each transaction. Choose the Web3 Provider environment and enter the RPC server address (e.g., HTTP://127.0.0.1:7545) when deploying contracts to Ganache in Remix IDE.
- Infura is a cloud-like infrastructure that provides Ethereum blockchain nodes as a web3 provider and access point to open networks like Ropsten. The DApp and smart contracts are set up by developers to connect to Infura’s endpoints.
Mechanism in DApps
- App.js, sometimes known as “glue code,” connects the web server and smart contract layers via web3.providers.
- It initialises the web3 object with the given web3 provider after linking the smart contract using its ABI and deployment address.
- Web3.providers handle network connectivity and simplify node types and protocols, allowing DApps to easily join and communicate with the Ethereum blockchain.
How to connect to web3 provider

Before connecting to MetaMask, Infura, or a local node, you require Web3.js or ethers.js. Initialising the library with a provider typically an instance of Web3.providers is a step in the connection procedure.Web3.providers.HttpProvider, Web3.providers.WebsocketProvider is a provider that is injected into the browser, such as window.ethereum.
Here’s a step-by-step breakdown:
Choose and Set Up Your Provider
- Browser-injected provider (e.g., MetaMask):
If you’re constructing a Dapp for MetaMask, you can directly access the provider using window.ethereum.
- Remote Provider (e.g., Infura, Alchemy):
Infura or Alchemy are remote providers that allow blockchain network interaction without browser plugins. Register with the supplier to get an API key or endpoint.
- A Local Node:
Owning an Ethereum node lets you connect via Websockets or IPC.
Get the Web3 Library installed
Install the Web3.js library using yarn or npm:
    npm install web3
    # or
    yarn add web3
Initialize Web3 with the Provider
const Web3 = require('web3');

// Using a remote provider (Infura example)
const infuraUrl = "YOUR_INFURA_URL";
const provider = new Web3.providers.HttpProvider(infuraUrl);
const web3 = new Web3(provider);

// Using a browser-injected provider (MetaMask example)
if (typeof window.ethereum !== 'undefined') {
  const web3 = new Web3(window.ethereum);
  // Request account access if needed
  window.ethereum.request({ method: 'eth_requestAccounts' })
    .then(accounts => {
      // You now have access to the user's accounts
    })
    .catch(error => {
      // Handle the error if the user denies access
    });
} else {
  // Handle the case where the user doesn't have a web3 provider
}
Interact with the Blockchain
Once you have a web3 instance, you can interact with the Ethereum network, such as: Get the current block number.
    web3.eth.getBlockNumber().then(blockNumber => {
      console.log("Current block number:", blockNumber);
    });
Get account details.
web3.eth.getAccounts().then(accounts => {
      console.log("Accounts:", accounts);
    });
Send a transaction.
web3.eth.sendTransaction({
      from: 'YOUR_ACCOUNT_ADDRESS',
      to: 'RECIPIENT_ADDRESS',
      value: web3.utils.toWei('1', 'ether'),
      gas: 21000
    })
    .on('transactionHash', hash => {
      console.log('Transaction Hash:', hash);
    })
    .on('receipt', receipt => {
      console.log('Transaction Receipt:', receipt);
    })
    .on('error', error => {
      console.error('Transaction Error:', error);
    });
Important Considerations
- Error Handling: Always handle blockchain errors, including user input and network requests.
- Security: Use security best practices while handling private keys or sensitive data.
- Pick a provider: Your needs determine the best provider. Browser-injected providers simplify user engagement, whereas remote providers scale and manage infrastructure.
