Introduction to GUI in Java
Traditionally, a lot of programming tutorials start with console-based programs, which use text input and output in a command-line window for interaction. Although graphical user interfaces (GUIs) are a great way to understand basic programming concepts, they remain the mainstay of current software development. By visualising information and enabling users to interact with applications through menus, text fields, and buttons rather to learning commands, graphical user interfaces (GUIs) offer a more intuitive and user-friendly experience.
Java provides a stable platform for developing graphical user interfaces (GUIs).

- Abstract Window Toolkit (AWT): The first GUI framework for Java was called Abstract Window Toolkit (AWT).
- Swing: A more robust and comprehensive collection of AWT-based UI elements.
- JavaFX: Java’s next-generation GUI framework, created to meet the developments in GUI design and the demands of contemporary GUIs.
Due to its popularity and status as a major advancement over AWT, Swing will be the main topic of our response.
AWT vs. Swing: Lightweight vs. Heavyweight Components
Swing’s roots and how it overcomes the AWT’s constraints must be understood in order to fully appreciate it.
Abstract Window Toolkit (AWT)
The AWT offered a graphical toolkit that was independent of platform and came with the Java Development Kit (JDK) 1.0. Nonetheless, the AWT’s components were heavyweight, which was a basic design feature.
Heavyweight components: These were AWT components that converted its visual components into analogous, platform-specific counterparts, which are sometimes called “peers.” For example, on macOS, an AWT button would utilise the native macOS button, and on Windows, it would use the native Windows button. Therefore, rather than Java itself, the underlying operating system determined how an AWT component should seem and feel. This resulted in platform-specific inconsistencies in appearance and offered constraints on modification and component diversity. These limitations made it difficult to create large-scale GUIs using AWT 1.0.
Swing
In 1997, Sun Microsystems added Swing to the Java Foundation Classes (JFC) in recognition of AWT’s shortcomings. Swing’s lightweight component design provided a better method.
- Lightweight components: Swing components don’t depend on native peers like AWT does. Instead, Java code is used to render them completely. Thus, a Swing button achieves a genuinely platform-independent appearance and feel by appearing the same on Windows, macOS, or Linux.
- Pluggable Look and Feel: Swing’s lightweight design has the important benefit of being pluggable. This feature enables developers to modify a component’s “look and feel” without changing the logic that underlies it. Developers can “plug in” many themes, such Nimbus, Metal (Java’s default), or platform-specific styles, to ensure uniformity or blend in with the native OS as they like.
- Relationship with AWT: It’s important to know that Swing reinforces AWT rather than replacing it. Swing uses a lot of AWT classes, either directly or indirectly, and it makes use of the same event-handling system that AWT introduced. The package
javax.swingcontains the swing components.
JFrame Class
As the top-level container for the majority of standalone GUI applications, the JFrame class is a key part of Swing. It is a representation of a typical window, including borders, a title bar, and the well-known minimise, maximise, and close buttons.
Creating a JFrame Window
In order to build a window, you usually instantiate a JFrame object and set the title of the window by supplying a string to its constructor.
Code Example: Creating a simple JFrame
import javax.swing.*; // Import the Swing library

public class SimpleWindow {
    public static void main(String[] args) {
        // Create a new JFrame container with a title
        JFrame frame = new JFrame("My First Swing Window");

        // Set the size of the window (width, height) in pixels
        frame.setSize(400, 300);

        // Make the application quit when the close button is clicked
        frame.setDefaultCloseOperation(JFrame.EXIT_ON_CLOSE);

        // Make the frame visible. By default, JFrames are invisible
        frame.setVisible(true);
    }
}
Code Output: Upon running this program, a new window will appear on your screen titled “My First Swing Window”, with dimensions of 400 pixels wide by 300 pixels high.
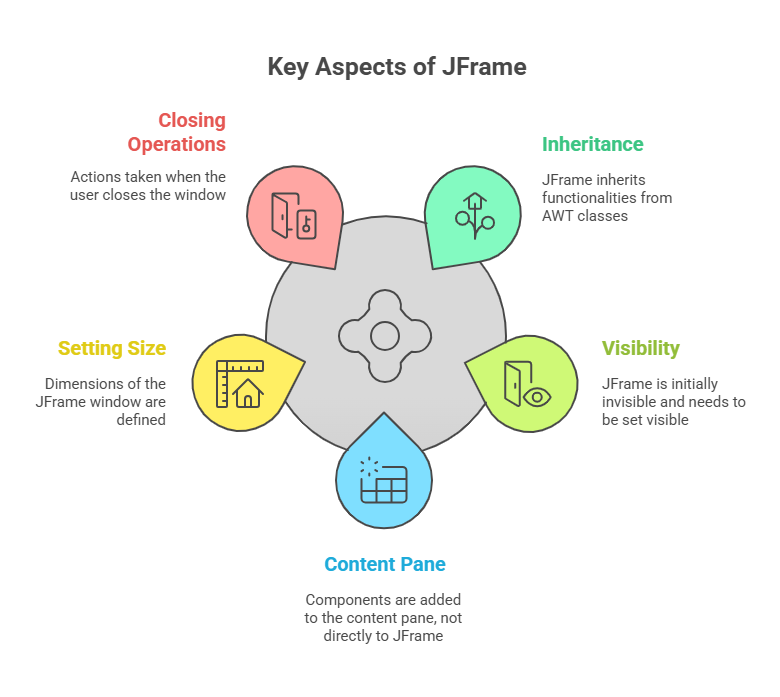
Key Aspects of JFrame:

- Inheritance: Because
JFrameis a subclass ofjava.awt.Frame, it inherits features from AWT classes such asContainerandComponent. - Visibility: A freshly formed
JFrameis by default invisible. To display it, you need to specifically usesetVisible(true). - Content Pane: Swing does not add components (such as buttons, labels, and text fields) directly to the
JFrame. They are instead included in its content pane. You useframe.getContentPane().add(component)to get the content pane. The content pane of aJFrameutilises aBorderLayoutby default. - Setting Size: The
setSize(width, height)method is used to specify the window’s pixel-by-pixel dimensions.SetPreferredSize()can be used in conjunction with layout managers to recommend an optimum size, even thoughsetSize()is simple. - Closing Operations: Managing what occurs when the user presses the close button is an essential component of
JFrame.- When the window is closed by default, it just disappears from the screen; the Java program may still be operating in the background.
- The
setDefaultCloseOperation(JFrame.EXIT_ON_CLOSE)function is used to guarantee that the entire program ends. DO_NOTHING_ON_CLOSE(ignores the close attempt),HIDE_ON_CLOSE(hides the window, program continues), andDISPOSE_ON_CLOSE(disposes the window, while the application continues) are additional possibilities forsetDefaultCloseOperation().
Basic Swing Components
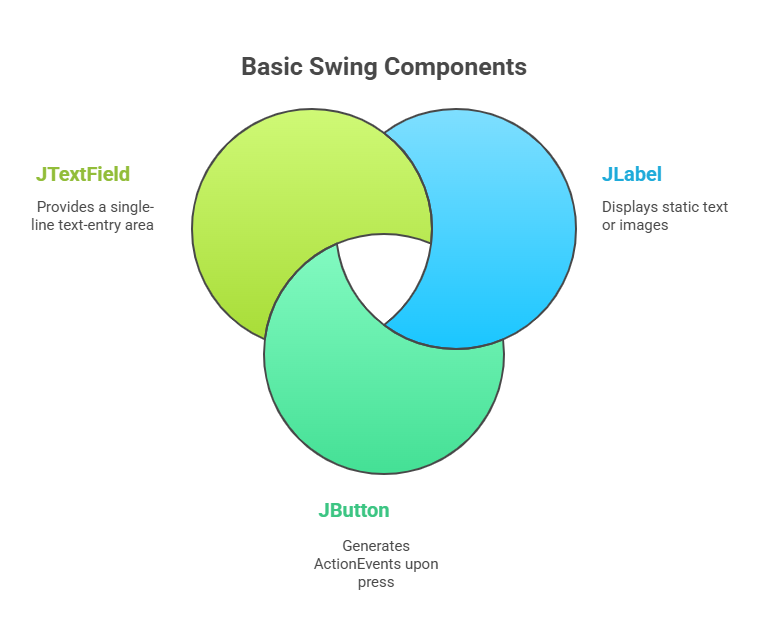
Every basic Swing component is a subclass of JComponent. Swing component class names typically start with the letter “J” (e.g., JLabel, JButton, JTextField). Additionally, it is essential to keep in mind that all GUI component interactions must take place on the event-dispatching thread. Wrapping GUI creation code within SwingUtilities.invokeLater() or SwingUtilities.invokeAndWait() is the standard method for handling this.

JLabel
The simplest part of Swing is a JLabel, which is used to show an image or static text. Being a passive component, it doesn’t react to input from the user. For the text to be displayed, its constructor frequently accepts a string. It’s interesting to note that JLabel can even produce HTML for structured or multiline text.
Code Example: JLabel
import javax.swing.*;
import java.awt.*; // Required for BorderLayout

public class LabelDemo {
    public static void main(String[] args) {
        SwingUtilities.invokeLater(() -> { // Ensure GUI updates are on the Event-Dispatching Thread
            JFrame frame = new JFrame("JLabel Example");
            frame.setSize(300, 150);
            frame.setDefaultCloseOperation(JFrame.EXIT_ON_CLOSE);

            // Create a JLabel with simple text
            JLabel simpleLabel = new JLabel("This is a simple label.");

            // Create a JLabel with HTML for multi-line text
            JLabel htmlLabel = new JLabel("<html><b>Hello</b><br><i>World!</i></html>");

            // Get the content pane and set a layout manager
            Container contentPane = frame.getContentPane();
            contentPane.setLayout(new FlowLayout()); // Arrange components in a row

            // Add the labels to the content pane
            contentPane.add(simpleLabel);
            contentPane.add(htmlLabel);

            frame.setVisible(true);
        });
    }
}
Code Output: A window titled “JLabel Example” will appear. It will contain two lines of text arranged horizontally due to FlowLayout. The first line will simply say “This is a simple label.” The second line will display “Hello” in bold and “World!” in italics on two separate lines, demonstrating HTML rendering in a JLabel.
JButton
A common control in graphical user interfaces, a push button is represented by a JButton. A button creates an ActionEvent when it is pressed. JButton, a subclass of AbstractButton, has the ability to show either an image or text. A button has to have an ActionListener registered with it using addActionListener() in order to work. Using getActionCommand(), which by default returns the text displayed on the button, you may determine which button was pressed inside the listener’s actionPerformed() method.
Code Example: JButton
import javax.swing.*;
import java.awt.*;
import java.awt.event.ActionEvent; // Required for ActionEvent
import java.awt.event.ActionListener; // Required for ActionListener interface

public class ButtonDemo implements ActionListener { // Implement ActionListener to handle button clicks
    JLabel responseLabel; // A label to display the button press

    ButtonDemo() {
        JFrame frame = new JFrame("JButton Example");
        frame.setSize(300, 200);
        frame.setDefaultCloseOperation(JFrame.EXIT_ON_CLOSE);
        frame.setLayout(new FlowLayout()); // Use FlowLayout for arrangement

        // Create two buttons
        JButton buttonUp = new JButton("Up");
        JButton buttonDown = new JButton("Down");

        // Add action listeners to the buttons
        buttonUp.addActionListener(this);
        buttonDown.addActionListener(this);

        // Create a label to show responses
        responseLabel = new JLabel("Press a button.");

        // Add components to the frame
        frame.add(buttonUp);
        frame.add(buttonDown);
        frame.add(responseLabel);

        frame.setVisible(true);
    }

    // This method is called when an action event occurs (e.g., button click)
    public void actionPerformed(ActionEvent ae) {
        String command = ae.getActionCommand(); // Get the command string (button text)

        if (command.equals("Up")) {
            responseLabel.setText("You pressed Up.");
        } else if (command.equals("Down")) {
            responseLabel.setText("You pressed Down.");
        }
    }

    public static void main(String[] args) {
        SwingUtilities.invokeLater(ButtonDemo::new); // Create instance on event-dispatching thread
    }
}
Code Output: A window titled “JButton Example” will appear, displaying “Up” and “Down” buttons, and a label initially reading “Press a button.” When you click “Up”, the label changes to “You pressed Up.” Clicking “Down” changes it to “You pressed Down.”
JTextField
An edit control is a single-line text-entry area that is provided by a JTextField. Text can be entered and edited by users in this component. JTextComponent has a subclass called JTextField. You can set the number of columns (width) and/or the beginning text using its constructors. You can use getText() to get the text that the user typed and setText() to set fresh text. The JTextField creates an ActionEvent when the user hits Enter while it is focused.
Code Example: JTextField
import javax.swing.*;
import java.awt.*;
import java.awt.event.ActionEvent;
import java.awt.event.ActionListener;

public class TextFieldDemo implements ActionListener {
    JTextField inputTextField; // Text field for user input
    JButton reverseButton;     // Button to trigger action
    JLabel outputLabel;        // Label to display results

    TextFieldDemo() {
        JFrame frame = new JFrame("JTextField Example");
        frame.setSize(350, 150);
        frame.setDefaultCloseOperation(JFrame.EXIT_ON_CLOSE);
        frame.setLayout(new FlowLayout());

        // Create a text field with 20 columns and initial text
        inputTextField = new JTextField("Enter text here", 20);
        inputTextField.addActionListener(this); // Listen for Enter key press in the text field

        // Create a button to reverse the text
        reverseButton = new JButton("Reverse Text");
        reverseButton.addActionListener(this); // Listen for button click

        outputLabel = new JLabel("Output: "); // Label to show the result

        // Add components to the frame
        frame.add(new JLabel("Input: "));
        frame.add(inputTextField);
        frame.add(reverseButton);
        frame.add(outputLabel);

        frame.setVisible(true);
    }

    public void actionPerformed(ActionEvent ae) {
        String actionCommand = ae.getActionCommand(); // Get the action command
        String currentText = inputTextField.getText(); // Get text from the input field

        if (actionCommand.equals("Reverse Text")) { // If the button was clicked
            StringBuilder reversedText = new StringBuilder(currentText).reverse();
            outputLabel.setText("Output: " + reversedText.toString());
        } else if (ae.getSource() == inputTextField) { // If Enter was pressed in the text field
            outputLabel.setText("You entered: " + currentText);
        }
    }

    public static void main(String[] args) {
        SwingUtilities.invokeLater(TextFieldDemo::new);
    }
}
Code Output: A window titled “JTextField Example” will appear. It will have an “Input:” label, a text field pre-filled with “Enter text here”, a “Reverse Text” button, and an “Output:” label.
- If you type “Hello” into the text field and press Enter, the output label will change to “Output: You entered: Hello”.
- If you type “World” and click the “Reverse Text” button, the output label will show “Output: dlroW”.
With code samples and intended results, this covers the basic ideas of Java GUI programming with Swing, including the main differences from AWT, the lifecycle and functionality of the JFrame class, and the use of essential components like JLabel, JButton, and JTextField.
