
Layouts in Java
Layout managers are essential Java utilities for managing how graphical elements are arranged and positioned inside a container. Instead of requiring manual positioning, which can be time-consuming and prone to problems across various platforms or resolutions, they automatically arrange controls within a window using predetermined algorithms.
Every Container object, including JFrames and JPannels, has a layout manager linked to it. The setLayout() method uses a default layout manager if no layout manager is explicitly set. Java has a number of standard layout managers, each with a unique method for component arrangement. In order to respect the minimum and preferred size demands of components, the layout manager is consulted at every stage of container resizing or initialisation.
These are a few examples of typical layout managers:
FlowLayout
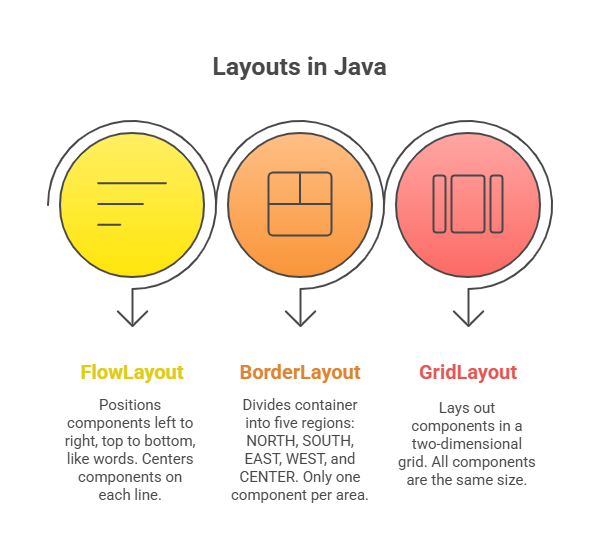
The layout manager by default for a JPanel and JApplet is called FlowLayout. Similar to how words are arranged in a text editor, its basic layout style arranges components from top to bottom and left to right. Layout moves to the next line when a line is filled. Each component usually has a tiny gap between it, both vertically and horizontally. By default, each line’s components are centred.
Constructors:
FlowLayout(): Creates the default layout, centering components with a five-pixel gap between them.FlowLayout(int how): Specifies how each line is aligned (e.g.,FlowLayout.LEFT,FlowLayout.CENTER,FlowLayout.RIGHT,FlowLayout.LEADING,FlowLayout.TRAILING).FlowLayout(int how, int horz, int vert): Allows specifying horizontal (horz) and vertical (vert) spacing between components.
Code Example (FlowLayout):
import java.awt.*;
import javax.swing.*;

public class FlowLayoutDemo extends JFrame {
    public FlowLayoutDemo() {
        setTitle("FlowLayout Example");
        setDefaultCloseOperation(JFrame.EXIT_ON_CLOSE);
        setSize(300, 150);

        // Set FlowLayout with left alignment
        setLayout(new FlowLayout(FlowLayout.LEFT, 10, 10)); // 10-pixel horizontal and vertical gap

        add(new JButton("Button 1"));
        add(new JButton("Longer Button 2"));
        add(new JButton("Button 3"));
        add(new JButton("Button 4"));
        add(new JButton("Btn 5"));

        setVisible(true);
    }

    public static void main(String[] args) {
        SwingUtilities.invokeLater(() -> new FlowLayoutDemo());
    }
}
Code Output (FlowLayout): When run, the buttons will appear from left to right. If the window is too narrow, buttons will wrap to the next line, maintaining the specified gaps and left alignment.
+------------------------------------+
| FlowLayout Example                 |
+------------------------------------+
| [Button 1] [Longer Button 2]       |
| [Button 3] [Button 4] [Btn 5]      |
|                                    |
+------------------------------------+
BorderLayout
Top-level windows such as JFrame (which by default uses BorderLayout) can use a standard layout style implemented by the BorderLayout class. The five regions it creates are NORTH, SOUTH, EAST, WEST, and CENTER.
Important aspects:
- Only one component may be added to a single area; if multiple components are added, only the final one will be shown.
- The
WESTandEASTsections modify the component’s height while maintaining its desired width. - While modifying the width, the
NORTHandSOUTHsections utilise the component’s selected height. - The
CENTERregion fills any remaining space. - When adding components, you must specify the region using constants like
BorderLayout.NORTH.
Constructors:
BorderLayout(): Creates a default border layout.BorderLayout(int horz, int vert): Allows specifying horizontal (horz) and vertical (vert) space between components.
Code Example (BorderLayout):
import java.awt.*;
import javax.swing.*;

public class BorderLayoutDemo extends JFrame {
    public BorderLayoutDemo() {
        setTitle("BorderLayout Example");
        setDefaultCloseOperation(JFrame.EXIT_ON_CLOSE);
        setSize(400, 250);

        setLayout(new BorderLayout(5, 5)); // 5-pixel horizontal and vertical gap

        add(new JButton("North Button"), BorderLayout.NORTH);
        add(new JButton("South Button"), BorderLayout.SOUTH);
        add(new JButton("East Button"), BorderLayout.EAST);
        add(new JButton("West Button"), BorderLayout.WEST);
        add(new JTextArea("Center content area"), BorderLayout.CENTER);

        setVisible(true);
    }

    public static void main(String[] args) {
        SwingUtilities.invokeLater(() -> new BorderLayoutDemo());
    }
}
Code Output (BorderLayout): The buttons and text area will stretch to fill their respective regions, with the CENTER component taking up the most space.
+----------------------------------------+
| BorderLayout Example                   |
+----------------------------------------+
| +------------------------------------+ |
| | North Button                       | |
| +------------------------------------+ |
| +-------+--------------------+-------+ |
| | West  | Center content area| East  | |
| | Button|                    | Button| |
| +-------+--------------------+-------+ |
| +------------------------------------+ |
| | South Button                       | |
| +------------------------------------+ |
+----------------------------------------+
GridLayout
A two-dimensional grid is used to arrange components using the GridLayout. The quantity of rows and columns is specified when you instantiate GridLayout. Components are added from top to bottom and then left to right to fill the grid. One important feature is that every element in the grid has the same dimensions, and as more are added, each one gets smaller to accommodate them.
Constructors:
GridLayout(): Creates a single-column grid layout.GridLayout(int numRows, int numColumns): Creates a grid layout with the specified number of rows and columns.GridLayout(int numRows, int numColumns, int horz, int vert): Allows specifying horizontal (horz) and vertical (vert) space between components. EithernumRowsornumColumnscan be zero, allowing for unlimited-length columns or rows, respectively.
Code Example (GridLayout):
import java.awt.*;
import javax.swing.*;

public class GridLayoutDemo extends JFrame {
    public GridLayoutDemo() {
        setTitle("GridLayout Example");
        setDefaultCloseOperation(JFrame.EXIT_ON_CLOSE);
        setSize(300, 200);

        // Set GridLayout with 3 rows and 2 columns
        setLayout(new GridLayout(3, 2, 5, 5)); // 5-pixel horizontal and vertical gap

        add(new JButton("Grid 1"));
        add(new JButton("Grid 2"));
        add(new JButton("Grid 3"));
        add(new JButton("Grid 4"));
        add(new JButton("Grid 5"));
        add(new JButton("Grid 6"));

        setVisible(true);
    }

    public static void main(String[] args) {
        SwingUtilities.invokeLater(() -> new GridLayoutDemo());
    }
}
Code Output (GridLayout): The six buttons will be arranged in a 3×2 grid, each occupying an equal amount of space and stretching to fit the cell.
+----------------------------------------+
| GridLayout Example                     |
+----------------------------------------+
| +----------+ +----------+             |
| |  Grid 1  | |  Grid 2  |             |
| +----------+ +----------+             |
| +----------+ +----------+             |
| |  Grid 3  | |  Grid 4  |             |
| +----------+ +----------+             |
| +----------+ +----------+             |
| |  Grid 5  | |  Grid 6  |             |
| +----------+ +----------+             |
+----------------------------------------+
Other Layout Managers
Although FlowLayout, BorderLayout, and GridLayout are essential, Java offers additional layout managers such as BoxLayout (for arranging components in a horizontal or vertical fashion), GridBagLayout (for creating flexible and intricate grids), and CardLayout (for stacking several layouts like index cards). These provide more specific case functionality and increased flexibility for more intricate GUIs.
Nested Containers and Layout Managers
Nesting is a common technique used by programmers to combine various layout managers and containers to construct complex graphical user interfaces. This makes it possible to have a hierarchical structure in which a JFrame may use one layout while JPanels, which are containers in and of themselves, are able to arrange their own components using several layouts. By dividing intricate designs into more manageable chunks, this method gets around the perceived drawbacks of individual layout managers.
One could, for instance, employ a JFrame with BorderLayout and then position a JPanel in the WEST region using GridLayout and another in the EAST region using FlowLayout. Highly customisable and flexible GUI designs are made possible by this flexibility.
Code Example (Nested Layouts):
import java.awt.*;
import javax.swing.*;

public class NestedLayoutDemo extends JFrame {
    public NestedLayoutDemo() {
        setTitle("Nested Layouts Example");
        setDefaultCloseOperation(JFrame.EXIT_ON_CLOSE);
        setSize(400, 250);

        // Main JFrame uses BorderLayout
        setLayout(new BorderLayout());

        // JPanel for the WEST region, uses GridLayout
        JPanel westPanel = new JPanel();
        westPanel.setLayout(new GridLayout(3, 1, 5, 5)); // 3 rows, 1 column, with gaps
        westPanel.add(new JButton("West 1"));
        westPanel.add(new JButton("West 2"));
        westPanel.add(new JButton("West 3"));

        // JPanel for the EAST region, uses FlowLayout
        JPanel eastPanel = new JPanel();
        eastPanel.setLayout(new FlowLayout(FlowLayout.CENTER, 5, 5)); // Centered flow
        eastPanel.add(new JButton("East A"));
        eastPanel.add(new JButton("East B"));

        // Add panels and a central component to the main frame
        add(westPanel, BorderLayout.WEST);
        add(eastPanel, BorderLayout.EAST);
        add(new JTextArea("Central Text Area"), BorderLayout.CENTER);
        add(new JLabel("South Status Bar"), BorderLayout.SOUTH);

        setVisible(true);
    }

    public static void main(String[] args) {
        SwingUtilities.invokeLater(() -> new NestedLayoutDemo());
    }
}
Code Output (Nested Layouts): The JFrame will have a JTextArea in the centre, a JLabel at the bottom, and two JPanels on the sides. The westPanel will arrange its buttons vertically in a grid, while the eastPanel will arrange its buttons horizontally.
+------------------------------------------------+
| Nested Layouts Example                         |
+------------------------------------------------+
|          +-----------------+ +------------+   |
|          |                 | |            |   |
| +------+ |                 | |            |   |
| |West 1| | Central Text Area | | East A | East B |
| +------+ |                 | |            |   |
| +------+ |                 | +------------+   |
| |West 2| |                 |                  |
| +------+ |                 |                  |
| +------+ |                 |                  |
| |West 3| |                 |                  |
| +------+ +-----------------+                  |
|                                                |
| +--------------------------------------------+ |
| | South Status Bar                           | |
| +--------------------------------------------+ |
+------------------------------------------------+
In Java GUI programming, layout managers are a basic idea that let programmers design flexible and organised user interfaces. It is quite easy to create complex layouts by knowing their separate properties and how to mix them.