Nested Component
In React.js, nested components are children of another component, creating a hierarchical structure. React’s power comes from its ability to break complex applications into smaller, autonomous, and reusable pieces that are easier to build, manage, and comprehend. Combining smaller, focused units to create larger components promotes separation of concerns by collecting similar CSS, JavaScript, markup, and images in a component’s directory.
Props (properties) provide data to nested components like HTML attributes but can carry JavaScript data types like texts, numbers, arrays, objects, and functions. The children prop in React collects any JSX elements between a component’s opening and closing tags, making it handy for designing wrapper components that arrange their contained parts consistently. The spread operator (…props) can feed unused props directly to deeply nested children to provide flexibility and reduce “prop drilling” (when props are routed via multiple intermediary components that don’t need them).
Components can be supplied as props for more complex scenarios, allowing more customisation than the children prop, which only allows one block of child content. Nesting also applies to logical constructs like routing, where React Router’s Switch and Route components define paths and render components, creating sensible URLs and improving user experience by keeping state across navigations.

Types of Nested Component
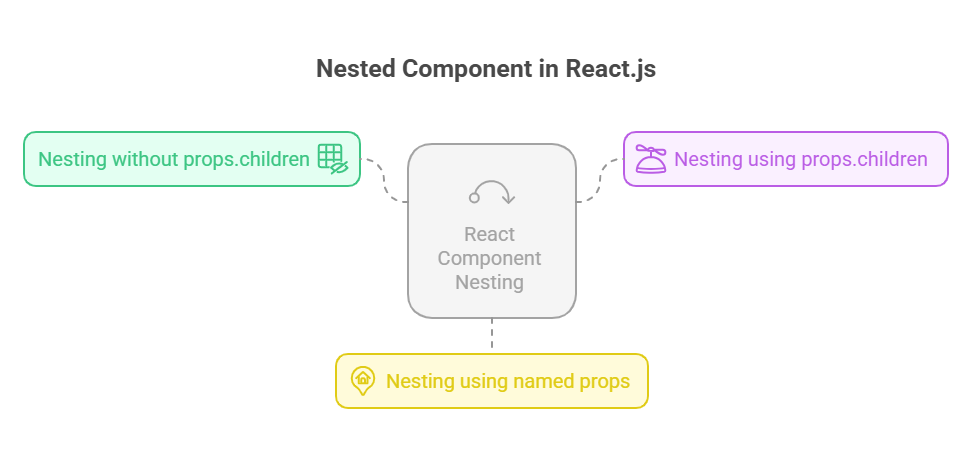
There are multiple ways to Nested Component in React, each with pros and cons of its own:
Nesting without using props.children: Not utilising any props, nesting.youngsters (Composition) Within its render method, a component in this manner immediately composes another component. Props may be effortlessly injected down to children depending on the state of the parent component, and UI components can be quickly and easily separated. It may decrease reusability and, if not handled appropriately, result in less visibility into the composition architecture. Presentational elements where the parent element is in charge of the child’s development.
Nesting using props.children: Making use of props to nest.youngsters With this approach, any nested components that are included between a component’s opening and closing tags are collected via a unique built-in prop named children. This increases the control that the parent component has over the rendering inside the child. Provides better reusability, increased insight into the composition architecture, and improved component lifecycle management. Restricted power and flexibility for the child components.
It works well in situations when the parent has control over the child’s lifecycle and a component needs to receive various content to compose later or elsewhere.
Nesting using named props: Nesting with specifically named props This method uses a named prop to give a component the ability to pass another component to its parent for a particular use. This makes it possible for wrappers to be extremely versatile and embed unique JSX in many places. Facilitates improved composability, simpler validation, and more structured composition. Because of the superficial comparisons, injecting props might occasionally be more “expensive” in terms of performance implications and provide less flexibility and power within the child components themselves. Component libraries or situations where a component has preset properties to create something and should know how to render but not necessarily what to render.
Code Example:
Create a reusable Instructions component and add it to an App component to show nesting.
import React from 'react';

const Instructions = () => (
  <p className="mt-4 text-center text-sm text-gray-500">
    Click on any emoji below to see its name in a message.
  </p>
);

const emojis = [
  { id: 'smiling-face', emoji: '😊' },
  { id: 'thinking-face', emoji: '🤔' },
  { id: 'star-struck', emoji: '🤩' },
  { id: 'party-popper', emoji: '🎉' },
];

const displayEmojiName = e => {
  const name = e.currentTarget.id.replace('-', ' ').replace(/\b\w/g, c => c.toUpperCase());
  const box = document.getElementById('message-box');
  box.textContent = `You clicked: {name}!`;
  box.classList.remove('hidden');
  setTimeout(() => box.classList.add('hidden'), 3000);
};

export default function App() {
  return (
    <div className="flex flex-col items-center justify-center min-h-screen bg-gray-50 p-4 font-inter">
      <div id="message-box" className="hidden fixed top-4 z-50 bg-green-500 text-white py-2 px-4 rounded-full shadow-lg transition-all duration-300 transform">Message</div>
      <div className="w-full max-w-xl p-8 bg-white rounded-3xl shadow-2xl border border-gray-100">
        <h1 id="greeting" className="text-5xl font-extrabold text-blue-600 text-center mb-4">Hello, World</h1>
        <p className="text-xl font-medium text-gray-800 text-center mb-6">I am writing JSX</p>
        <Instructions />
        <ul className="flex justify-center gap-6 mt-6">
          {emojis.map(e => (
            <li key={e.id} id={e.id} onClick={displayEmojiName} className="text-6xl cursor-pointer p-4 transition-transform transform hover:scale-110 active:scale-95 duration-200">{e.emoji}</li>
          ))}
        </ul>
      </div>
    </div>
  );
}
Output:
Message
Hello, World
I am writing JSX

Click on any emoji below to see its name in a message.

•😊
•🤔
•🤩
•🎉
By constructing smaller, independent UI components, nested components enable versatile, customisable apps.UseState and useEffect React Hooks manage state and side effects for functional components like class components.
Conclusion
In conclusion, React.js layered components offer a strong method of organising apps by dividing them into manageable, expandable chunks. Nesting encourages concern separation and enhances code clarity whether utilising named props, props.children, or direct composition. With this method, developers may create highly customisable user interfaces, pass data flexibly, and regulate component behaviour. The foundation of contemporary, scalable, and maintainable React apps is made up of nested components in conjunction with React Hooks like useState and useEffect for handling state and side effects.
