
Kubernetes is the container orchestration standard for cloud-native technologies, which are growing rapidly. However, the crucial choice of how to deploy and manage their environment is where many organizations and developers start their journey rather than writing code. Setting up a Kubernetes environment is no more a “one-size-fits-all” endeavor, as recent changes in the industry have shown. Instead, it varies greatly dependent on unique demands, ranging from straightforward local installations for learning to intricate, high-availability production clusters.
The Rise of Managed Services: Simplicity in the Cloud
Thanks to the growth of Managed Kubernetes Services, or Kubernetes-as-a-Service (KaaS), the barrier to entry has never been lower for newcomers to the ecosystem. Because the cloud provider takes care of the heavy lifting for Control Plane administration, high availability, and regular upgrades, these services are highly recommended for both novices and enterprise-level production applications.
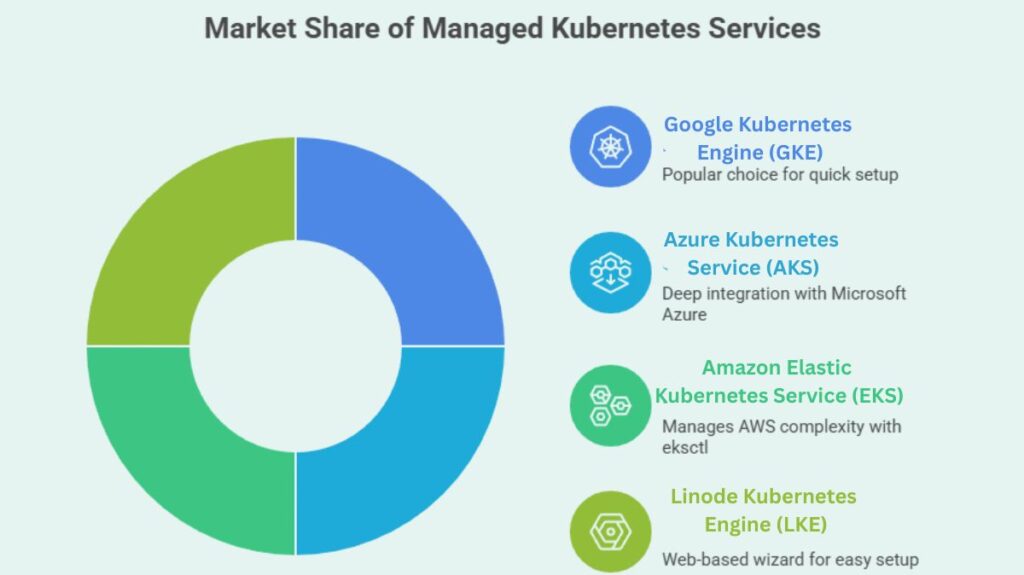
Several large organizations dominate the market, offering unique integration paths:
- Google Kubernetes Engine (GKE): Still popular, GKE allows clients quickly set up clusters using the gcloud CLI or Google Cloud Console.
- Azure Kubernetes Service (AKS): AKS, managed by the az CLI, integrates deeply with Microsoft Azure.
- Amazon Elastic Kubernetes Service (EKS): The command-line application eksctl manages AWS’s complexity.
- Linode Kubernetes Engine (LKE): This web-based wizard provides clusters quickly and easily.
You can also read What is the Importance of Kubernetes & Why Kubernetes?
Democratising Development: The Power of Local Tools
Local development tools are needed for testing and learning without excessive cloud charges, even though the cloud enables scale. These tools let engineers model clusters on PCs.
Docker Desktop, which activates a single-node Kubernetes cluster with one click in the settings menu, is popular. Minikube is the ideal hands-on teaching solution for traditional learners since it runs a single-node cluster in a virtual environment. In the meantime, Kind (Kubernetes IN Docker), which runs clusters utilizing Docker container “nodes” rather than bulky virtual machines, has become popular for multi-node testing and CI/CD pipelines.
The Architect’s Choice: Self-Managed and Bare Metal
A portion of the sector still needs complete control over its infrastructure, despite the ease of managed and local solutions. Many people use kubeadm, the basic Kubernetes bootstrapping tool, to construct clusters on physical servers or private virtual machines.
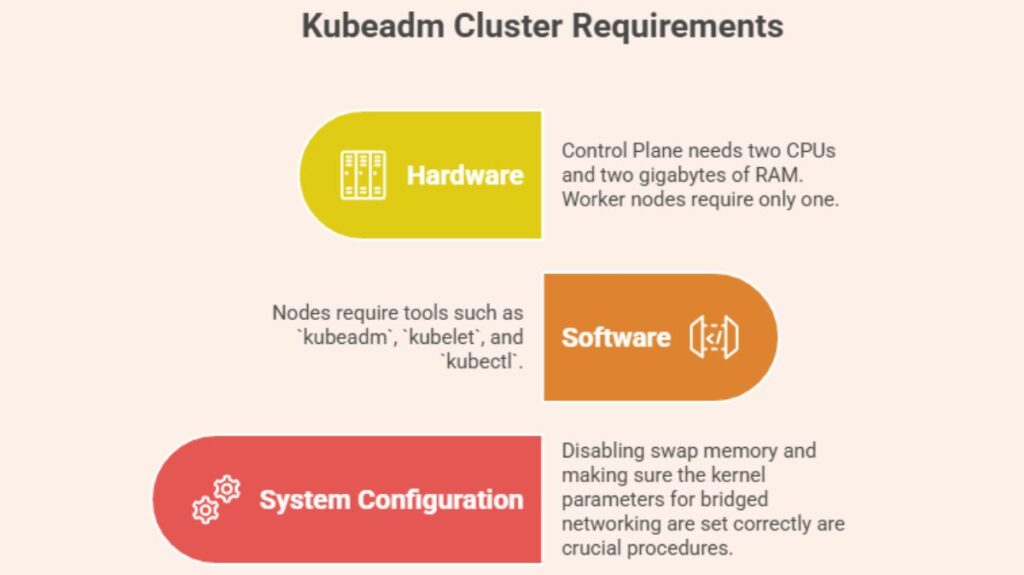
Building a cluster from scratch requires hardware and software. To be stable, each node must match criteria:
- Hardware: The Control Plane necessitates two CPUs and two gigabytes of RAM, while worker nodes require only one.
- Software: Nodes require tools such as
kubeadm,kubelet, andkubectl. - System Configuration: Disabling swap memory and making sure the kernel parameters for bridged networking are set correctly are crucial procedures.
A logical path of cluster internalization is followed in the Step-by-Step Kubeadm Setup. The Control Plane is first initialized on the master node using the sudo kubeadm init command. Administrators need to store the resulting “join command” for subsequent use once the master is operational.
You can also read What is Kubernetes Architecture, Features of K8s
Finalising the Cluster: Networking and Access
No cluster can function without internal and external communication. To access kubectl, engineers must configure the Kubeconfig file located at ~/.kube/config. This allows the kubectl tool to communicate effectively with the Kubernetes API.
Pod Network Add-on (CNI) installation may be the most crucial stage in self-management. Without Calico, Flannel, or Weave Net, pods cannot network. Run the stored kubeadm join command on each subordinate node after the network layer is operational to join worker nodes to the cluster.
The standard command-line tool for cloud and local cluster communication is Kubectl. It manages Contexts, which allow the tool to easily switch clusters. Success in any setup method can be verified through simple diagnostic commands like kubectl cluster-info or kubectl get nodes, marking the beginning of the user’s journey into the world of containerised orchestration.
You can also read What is Container Orchestration in Kubernetes?